
Photoshop : 노란 색조 제거-작동 방식
Photoshop에서 노란색 색조와 같은 원하지 않는 색상 변화를 쉽게 제거 할 수 있습니다. 이 실용적인 팁에서는 진행 방법을 보여줍니다.
Photoshop에서 노랑 색조 제거 : RAW 형식의 이미지와 화이트 밸런스
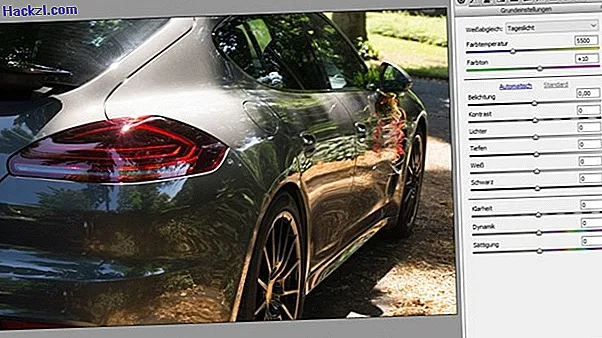
문제를 해결하는 가장 쉬운 방법은 이미지를 RAW 형식으로 만드는 것입니다. Photoshop에서 열면 모든 종류의 항목을 설정할 수있는 대화 상자가 자동으로 나타납니다.
- 드롭 다운 "화이트 밸런스"를 사용하면 미리 정의 된 몇 가지 색 온도 중에서 선택할 수 있습니다.이 온도는 주로 사진에 적합한 설정을 제공합니다. 색상 변화를 방지하기 위해 카메라의 화이트 밸런스를 조정하십시오.
- 또는 색 온도 컨트롤을 사용하여 사진에서 노란색 색조를 제거 할 수도 있습니다. 최종 미세 조정을 위해 색조를 고려하는 것을 잊지 마십시오.
- 추가 노출 설정 옵션도 있습니다.
노란 색조 제거 : CMYK 그라데이션 곡선을 통한 조정
이미지가 RAW 형식이 아니라 JPG 형식 인 경우에도 이미지에서 노란색 톤을 제거하는 정확한 방법이 있습니다.
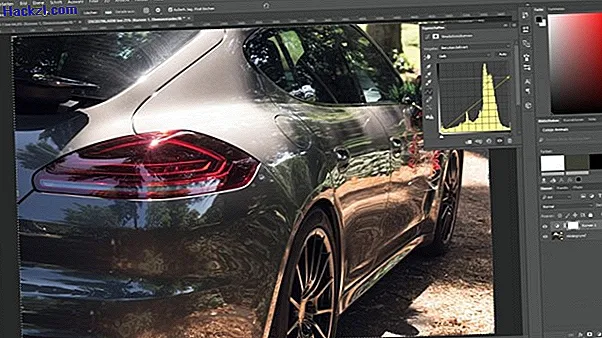
- 먼저 이미지를 CMYK 인쇄 잉크로 변환하여 노란색을 개별적으로 색조로 처리 할 수 있습니다. 이렇게하려면 "이미지", "모드"및 "CMYK 색상"을 차례로 클릭하십시오.
- CYMK는 RGB에 비해 더 큰 색 공간이므로 Photoshop에서는 정확한 색조를 인식합니다. 이것은 색상 프로파일을 사용하여 수행됩니다. 별도의 대화 상자에서 색상 변환을 확인해야합니다.
- 레벨 개요에서 반원으로 채워진 버튼을 사용하여 새 설정 레벨을 만들고 그라데이션 곡선을 선택하십시오.
- 새로 열린 창에서 아래쪽 드롭 다운에서 노란색을 선택할 수 있습니다. 그런 다음 그림의 결과가 마음에들 때까지 카운트의 오른쪽 위 모서리를 약간 아래로 당깁니다.
Photoshop의 노랑 색조 : 색상 균형 및 색조 / 채도를 통한 조정
노란 색조를 제거하는 또 다른 간단하지만 유용한 방법은 "색상 균형"및 "색조 / 채도"슬라이더를 사용하여 조정하는 것입니다.
- "이미지"버튼 및 "수정"메뉴 항목을 사용하여 "컬러 밸런스"에 액세스 할 수 있습니다. "색조 / 채도"는 동일한 메뉴에서 찾을 수 있습니다. 결과가 마음에들 때까지 컨트롤로 연주하십시오.
- 이 영역의 모든 설정을 조정해야하므로이 과정이 다소 번거롭고 다루기 어려워집니다. 대부분의 경우 일부 이미지 정보가 손실되므로 결과가 그라데이션 곡선만큼 좋지 않습니다.

Adobe Photoshop CC : 첫 번째 테스트의 혁신
이 실용적인 팁은 Photoshop에서 눈 색깔을 변경하는 방법을 보여줍니다.